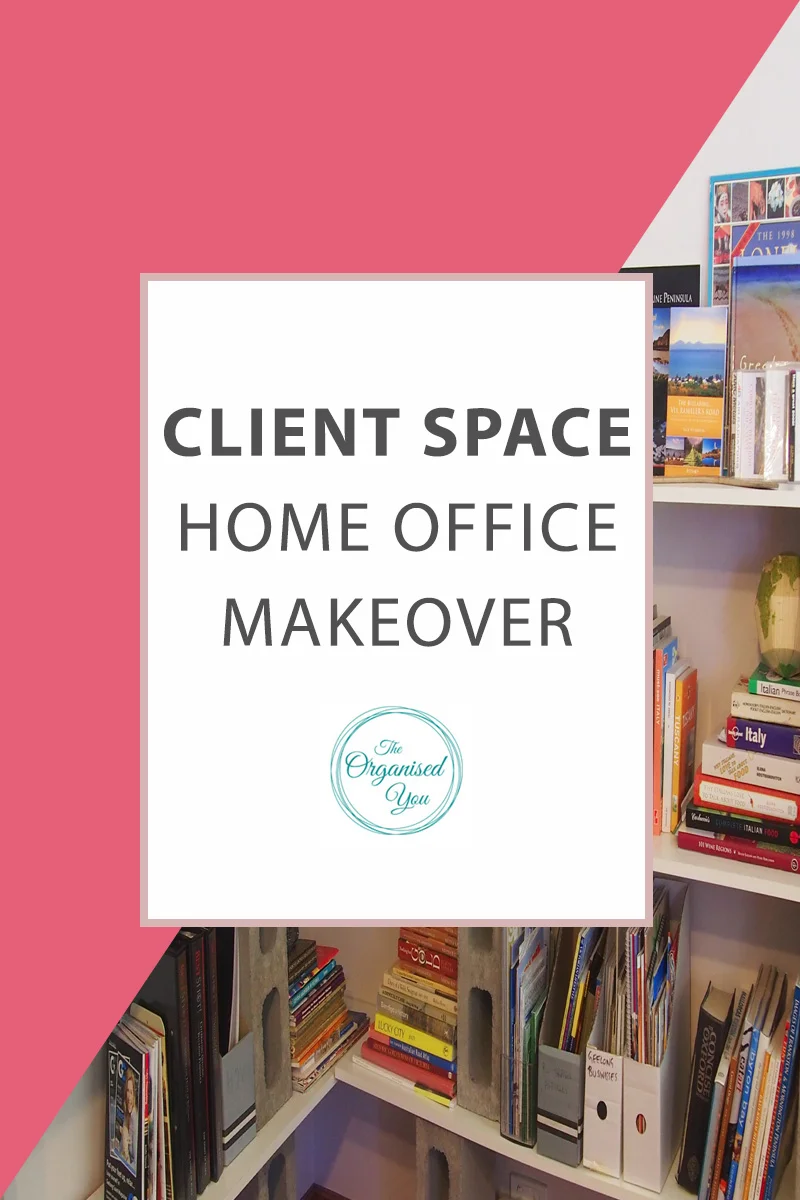
A few months ago, a client contacted me for help organising her spare room/home office. Home offices are the spaces I help clients with the most, and for good reason. Lack of systems for organising paperwork, not enough storage, and holding on to too much 'stuff' are common problems I'm sure many people could relate to.
My client was feeling extremely overwhelmed about where to start, how to configure the room so that she could have guests stay over, and how to declutter everything that was squeezed into this room. Decluttering can be a very emotional and tiring experience, but if you know the right steps to take, the end result is both freeing and rewarding. Here's how we did it!
We worked on this room together for 5 hours straight, which was pretty crazy-going, but amazing to look back on these photos so see how much we achieved! My client was then able to continue the decluttering process herself, so she has not only come away with a fantastic new space, she also learnt some valuable organising skills.
If you'd like to learn the step-by-step process for tackling the decluttering of any space in your home, you can check out my guided, online course 'Chaos to Calm' right here! >>
Let me show you what we accomplished, following the decluttering steps that I outlined here.
BEFORE:
When you walked into the spare room, the door would bang into this unit that hid behind it - a catch-all for stationary, paperwork, bags and baskets.
To the left of the door was a display/storage unit. You all know I love an Ikea Expedit, but they do have the danger of becoming filled with miscellaneous 'stuff'. My client is a kinder teacher, plus she often has her niece and nephew to stay, so there were a lot of toys, artwork and kids' books squeezed onto these shelves. There were also stacks of paperwork, photos and old frames, and bits and pieces that needed to be sorted.
A work desk was squeezed into the corner of the room, but was not easily accessible or usable.
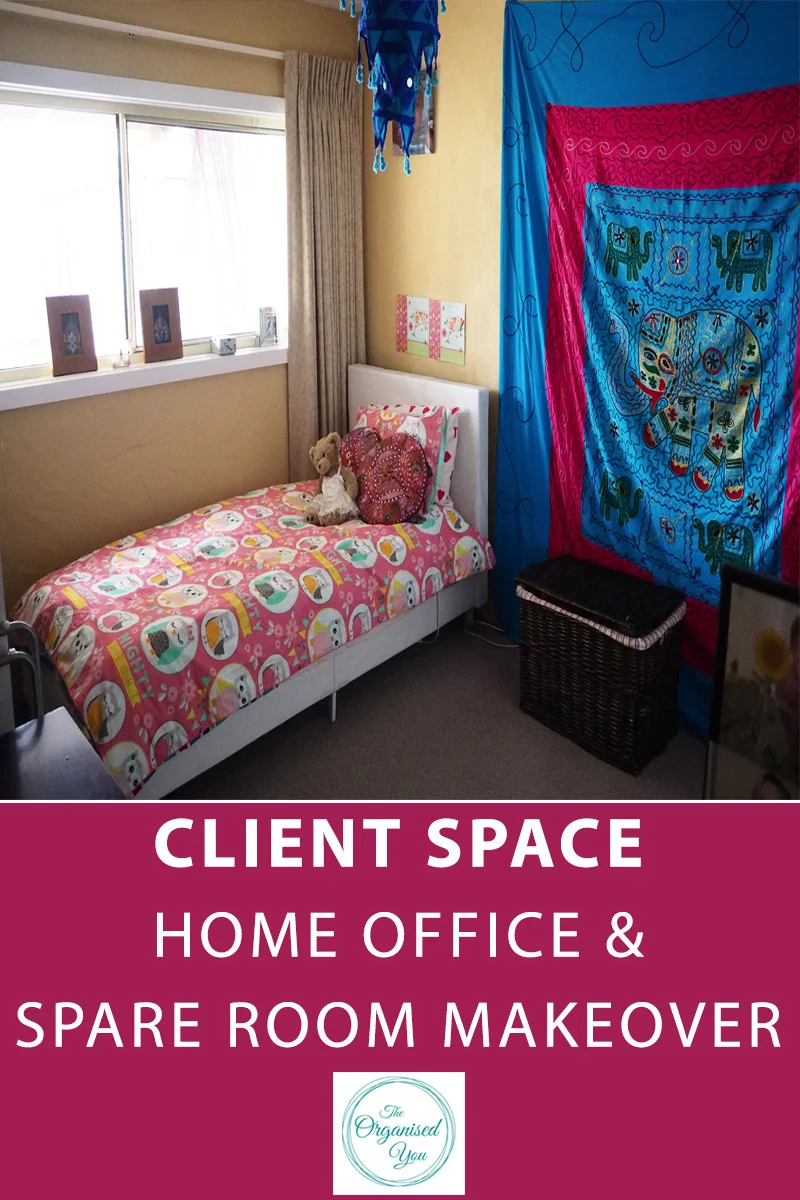
My client also wanted to be able to fit 2 beds, or a bed and trundle, into the room, so we needed to do some re-configuring.
Last but not least, the storage cupboard in the room was pretty jam-packed and needed a good sort, especially with the mattress being directly in the middle of the cupboard, preventing accessibility to what actually sat on the shelves!
Why tackle everything at once I hear you ask? Well, sometimes starting with one area of a room leads to needing storage space elsewhere, and reconfiguring a room means you have to organise different areas anyway. I love to just get stuck into the whole space, but it is a full-on process so you need to have a positive attitude and be prepared for some quick decision-making!
BONUS: Find out the 11 essential tools for any organising project and get your free handy checklist!
So the first thing we did was pull nearly everything out of the room and create [labelled] piles. You can see the main categories below.
With a completely cleared room, we could move the desk out from the corner of the room, push the empty storage unit against the wall, and turn the bed around so that a trundle bed or spare mattress could fit in the empty space next to it.
The books were sorted through, and only the quality ones kept and re-organised on the shelves. The rest were put in the 'donate' pile. We kept the books on the bottom shelves so the kids could easily access them.
Added to the 'donate' pile were quite a few toys, especially the big plastic ones that were hardly ever used and were taking up valuable storage space! We used this great toy box to hold all the soft toys and puppets.
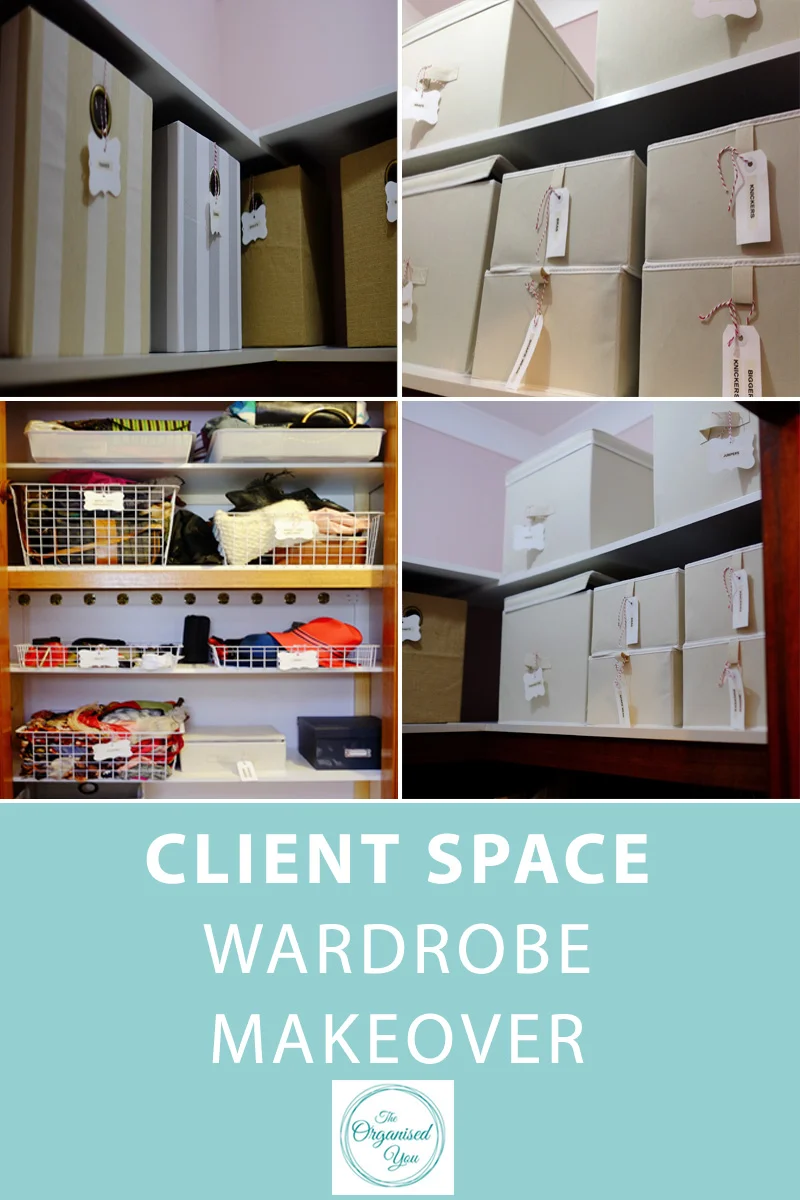
The storage cupboard was re-organised to hold photo albums, larger toys, and a crate full of craft supplies.
The other side held a VERY condensed collection of gift bags, gift wrapping supplies and a few more toys. Without the mattress in the middle of this space (we ended up putting it in the 'donate' pile as it wasn't even used), it was great to have everything accessible again.
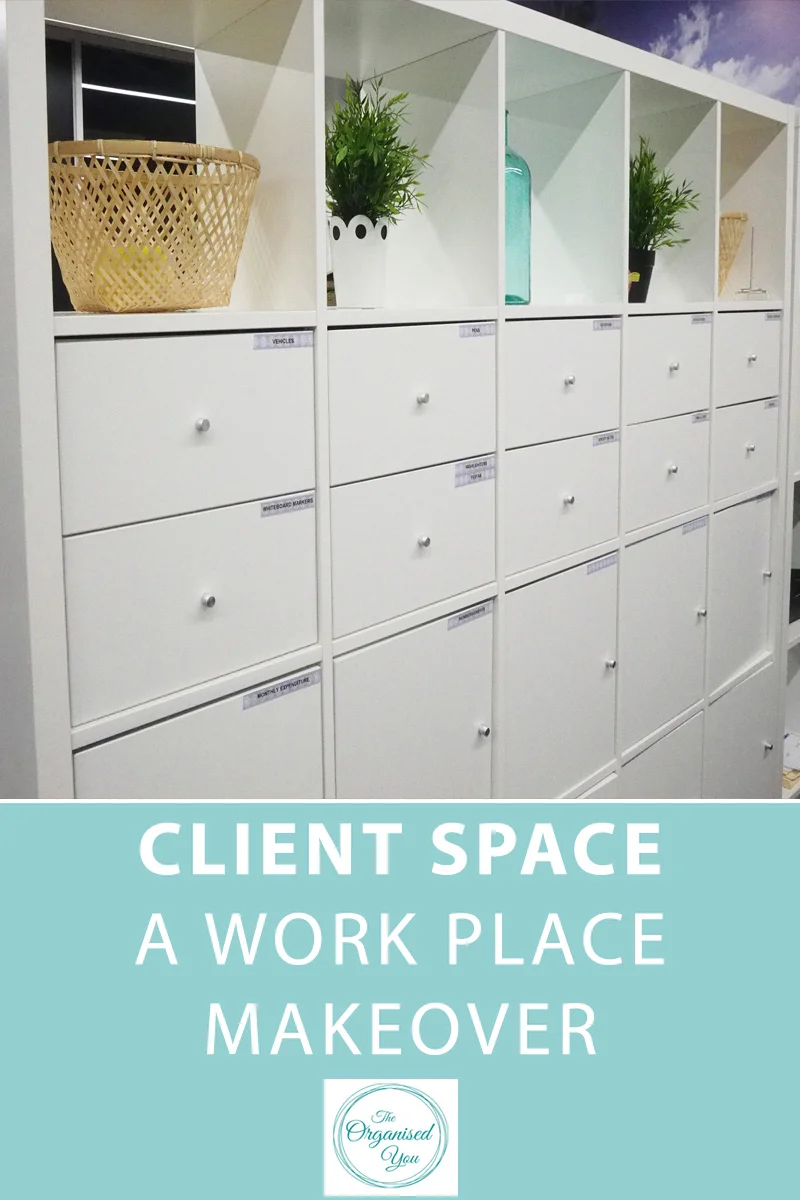
We moved the unit that was behind the door into the bathroom, which provided great extra storage for towels and toiletries. We then unloaded the stationary and other bits and pieces into the Expedit.
I love a well-labelled storage unit :)
>> Want to learn the step-by-step process for tackling
the decluttering of any space in your home?
Check out my online course 'Chaos to Calm'! >>
By the end of the day, there was a huge amount of items in the 'donate' pile! The extra storage space from getting rid of so many large items was fantastic, and it's a great feeling to be able to pass on items to others who will actually use them. We also had 3 garbage bags full of rubbish, so it really was a mega declutter!
After:
I felt very proud of my client by the end of the day as she did an amazing job of sorting through everything - an emotional and tiring experience, but very rewarding! Although we had a few jobs we didn't get to, such as sorting through some of the paperwork and photo collection, we really did accomplish so much in the 5 hour session. Have a look...
Now there's a beautiful, clear space that can be used as both a home office and spare bedroom!